Gone are the days when you needed to mess with Liquid code or install a third-party app to add or manage Shopify Metafields. Thanks to Online Store 2.0, you can now customize the content and functionality of your Shopify store straight from the admin panel.
Metafields are incredibly easy to use and highly versatile. You can use them to customize different parts of your Shopify store, including products, variants, collections, and customer data.
In this article, we share a high-level overview of Shopify Metafields to help you understand what they are and teach you how to add a metafield to your store.
Ready to learn? Let’s get started!
Shopify Metafields in a Nutshell
Metafields allow you to add information to a part of your Shopify store, such as a product, collection, or customer from the Shopify admin. As a result, you can customize different parts of your store without code.
For example, suppose you sell t-shirts through your Shopify store. In that case, you can create a metafield to add attributes that describe the product, such as the sleeve length, fabric type, and fit.
Once you create a metafield, you can configure where it’s displayed on the product display page and even make the metafield filterable on the collection page.
A metafield in Shopify consists of the following parts:
Namespace: A value that groups metafields to prevent conflicts with other metafields with the same key name.
Key: The metafield’s name.
Type: The type of information that the metafield can store.
Value: The string value data stored in the metafield.
In addition to a metafield, Shopify also allows you to add metafield definitions to specify which resource a metafield applies to and the type of value it can store. These templates provide data validation to prevent conflicts between metafields.
Shopify allows you to add metafield definitions in two ways:
Using a standard definition.
Creating a custom definition.
Standard definitions are predefined definitions that are universally compatible across Shopify. We recommend using standard metafield definitions as often as possible to prevent compatibility issues with Shopify apps and themes.
Metafield Supported Content Types and Values
Shopify Metafields supports different content types and values to meet the varying demands and use cases of Shopify merchants. Here’s a quick overview of the supported metafield content types and values.
Content Type
Supported Value
Color
RGB values in the hexadecimal (#RRGGBB) format.
Date
ISO 8601 format date values excluding time zone.
Date and time
ISO 8601 format date values and UTC time values.
Dimension
Whole and decimal number values in either metric or imperial units.
Weight
Whole and decimal number values in either metric or imperial units.
Volume
Whole and decimal number values in either metric or imperial units.
Number
Integer and decimal values.
Rating
Decimal values along a set scale.
Product reference
Links to one or more products in a metafield list.
Product variant reference
Link to a product variant.
File reference
A single file meeting
Shopify’s file format requirements
.
Page reference
Link to an existing page.
URL
HTTP, HTTPS, and mailto: URLs.
Text
Plain-text single and multiple line fields.
True or false
Checkbox.
JSON
Raw JSON data.
How To Add Metafields in Shopify
Follow these steps to add a product metafield in Shopify.
1. Create a Metafield Definition

Log in to the Shopify admin and go to Settings > Metafields.
Select a resource to add a metafield, such as Products, and click Add definition.
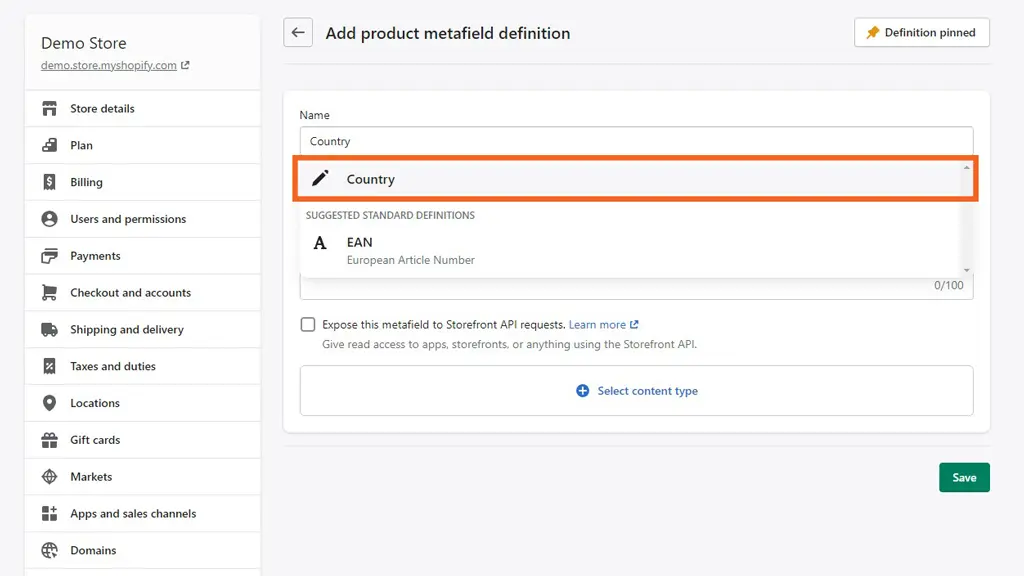
In the Name field, enter a descriptive name for your metafield definition. For example, Country. Then, choose a standard definition from the available list.
Next, enter a value in the Namespace and key text area. This value is the name of your metafield and Shopify will use it to identify the definition.
Then, configure the following optional settings:
Description: Enter a description.
Expose this metafield to Storefront API requests: Leave it unchecked to prevent custom storefronts from displaying the values entered in this metafield.
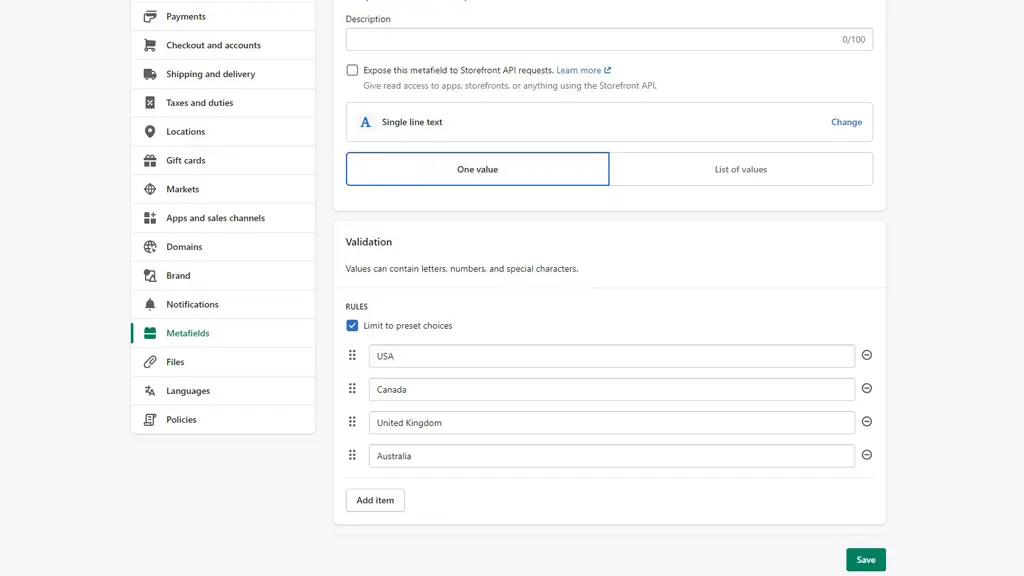
Click Select content type to configure how the metafield will be represented on the frontend of your store. We’ve selected Text for this example.
You can add validation rules in the Validation section to ensure only values that meet a certain criteria are permitted. Alternatively, you can tick the Limit to preset choices checkbox to define preset options.
Click Add item to add more items, reorganize them using the six dot icon, and click Save when you’re done to finish creating the metafield definition.
2. Add values to the Metafield
Now, it’s time to add values to the metafield. Go to the part of your Shopify store that you want to customize, such as a product, collection, or customer. Here, we’re customizing a product.
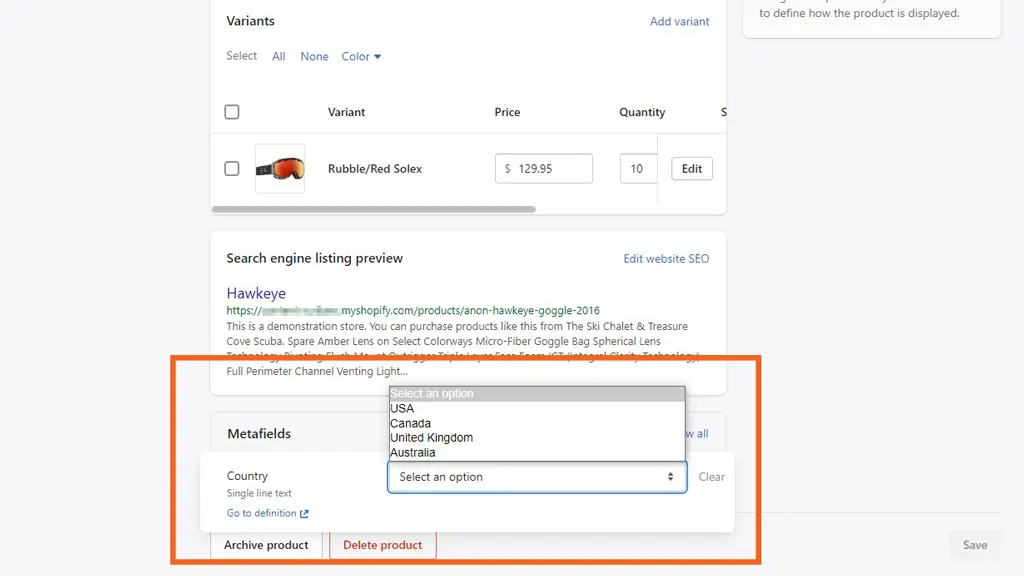
On the product editing page, scroll to the Metafields sections and click on the empty space next to the Country metafield.
Using the popup, choose a value for the metafield using the dropdown menu and click Save when you’re done.
3. Connect the Metafield to your theme
After you’ve configured the metafield on the backend, it’s time to connect it with your Online Store 2.0-based theme so it displays on the frontend. Follow these steps to connect a metafield to your theme.
Navigate to Online Store > Themes and open the Shopify theme editor by clicking on the Customize button next to your preferred Shopify theme.
Go to the template where you want to show the metafield, such as a product or collection page. Here, we’re customizing the Product template to add the metafield to all the products on our store.
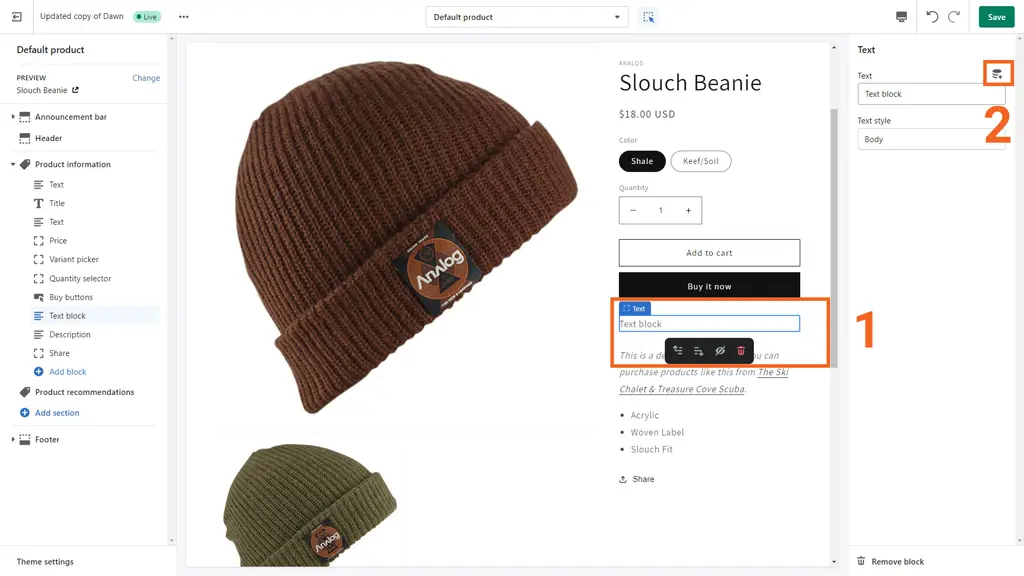
Then, add a block or section that supports dynamic sources to the page. Here, we’ve added a Text block.
Once you’ve inserted the block or section, select the block and click on the Connect dynamic source icon.
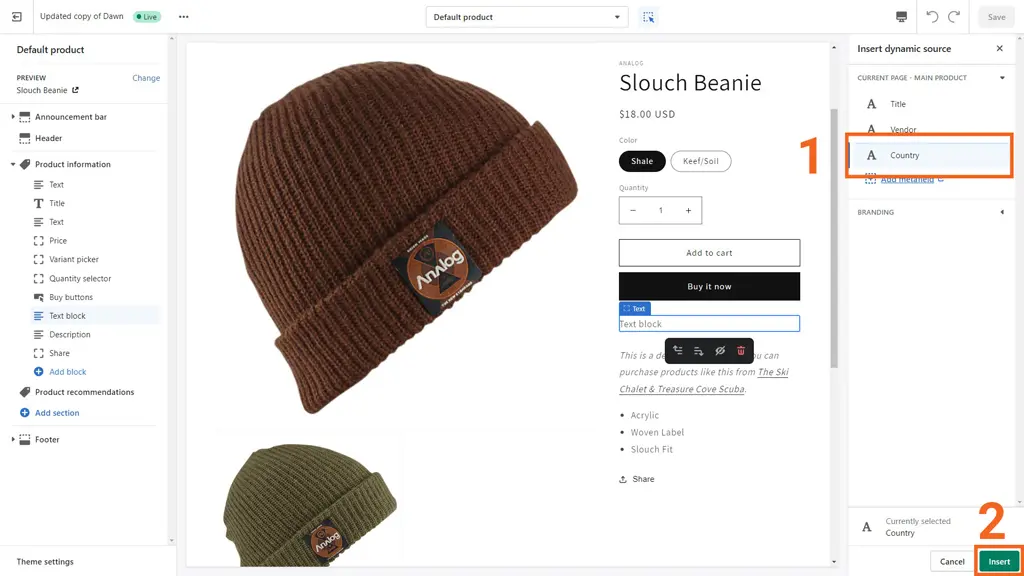
Then, choose the metafield you want to connect or add a new metafield definition by clicking Add metafield.
After that, click Insert to add the metafield to the page and add some text before it for more context. For instance, here, we’ve added “Country of Manufacture: ”.
Once you’re done, click Save to finish adding the metafield.
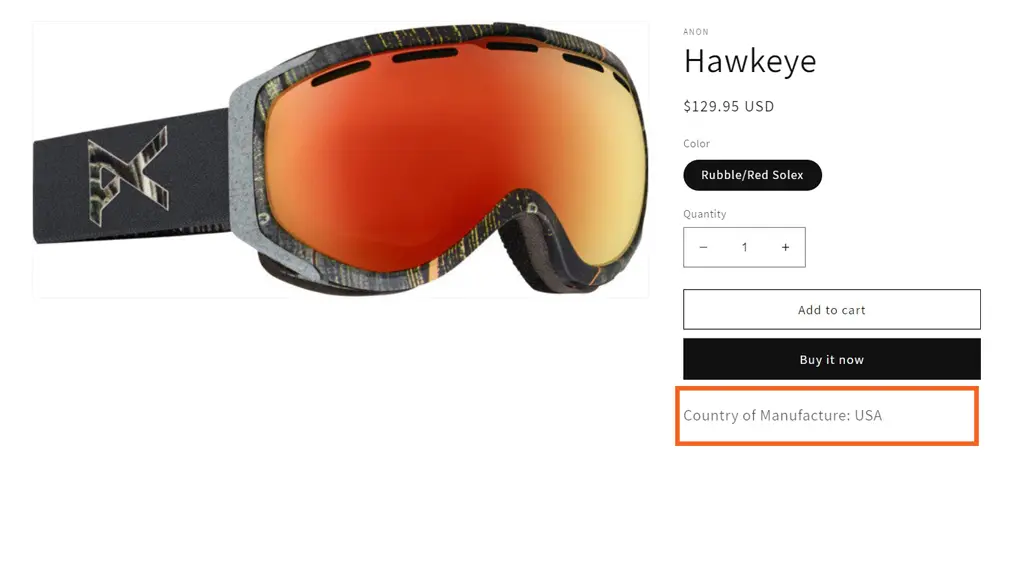
Great work! The newly created metafield will now display on your storefront. Here’s what it looks like on our demo product page:
Shopify Metafields: Code-Free Customization for Shopify Merchants
We’ve explained what Shopify Metafields are and how you can add metafields to your product page. But that only scratches the surface of what’s possible. You can do all kinds of cool things with metafields, including:
Adding launch dates for products.
Inserting downloadable product manuals.
Displaying manufacturing and expiration dates for goods.
And that’s not all. You can also use metafields with Shopify Flow to create triggers and automated workflows. But before you start using metafields on your store, make sure you’re using an Online Store 2.0 theme such as the Dawn theme.
If you aren’t, contact us for a consultation. We’ll help you add metafields by editing your theme code, or better yet, upgrade to an Online Store 2.0 theme.