Magento is downloaded nearly 5000 times daily, making it one of the most preferred ecommerce solutions on the planet. A migration to the platform’s current version, Magento 2, has proven to deliver a 165% ROI (return on investment).
Magento should be an excellent bet if you want to grow your business online. It is the best open-source ecommerce platform for building an online store. Despite being professional, Magento Open Source is totally free.
But you can also opt for Adobe Commerce and enjoy a more feature-rich and highly scalable platform if you are a larger business.
We’ll discuss these details below, highlighting when to use Magento Open Source and Magento Commerce versions. More importantly, we'll walk you through the Magento headless development process to help you set up your store on this powerful platform.
Magento headless development: all you need to know
We’ll get into the details of headless development shortly. But first, let’s understand the Magento ecommerce platform.
Magento is a popular all-in-one ecommerce platform for businesses of all sizes. It comes in two versions: Magento Commerce, currently known as Adobe Commerce, and Magento Open Source.
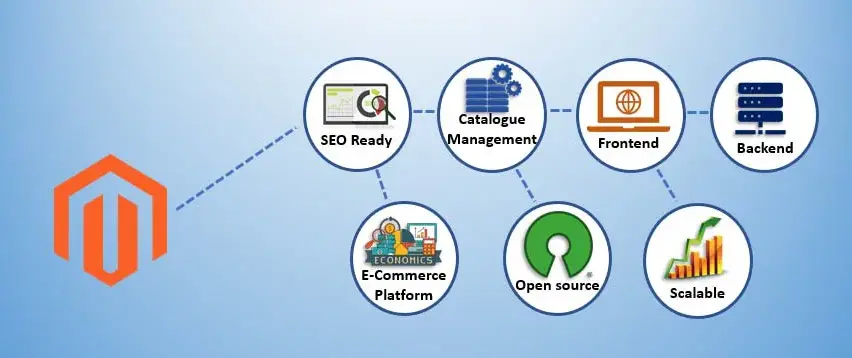
Each version has the resources to help you start, grow, market, and scale your ecommerce store with minimum effort.
The Magento 2 Open Source is a free solution loaded with professional features that are ideal for a small business on a budget. It is available under an Open Software License, so developers and businesses can customize and modify the software to suit specific business needs.
This can include extending the core functionality of Magento 2 by adding new plugin modules from other developers.
The Magento Commerce 2, or Adobe Commerce, is a premium paid-for version with cloud-based and on-premises options. It is highly feature-rich and scalable, making it ideal for larger businesses that require a more robust platform.
While the free open-source Magento 2 software is not as robust as its Adobe Commerce cousin, it is sufficiently feature-rich. Once you have your hosting installation, you can create a professional, technically advanced online store without having to use any paid plugins.
The use of such plugins remains optional, depending on how much you want to extend the platform’s functionality.
About the headless development part
Headless development is the approach of separating the Magento front end and the back end. In other words, the headless development separates the front-end components from the back-end functionality of a Magento e-commerce website.
Therefore, this Magento implementation approach requires developing the front end and back end separately and then joining the two ends with an application programming interface (API).
In a traditional Magento setup, the front end (what users see and interact with) and the back end (where business logic and data management occur) are tightly coupled.
Decoupling the two ends in a headless Magento architecture allows for increased flexibility, faster development times, better scalability, faster webpage load times, and improved user experience overall.
Magento Implementation in a Headless Setup
Implementing a headless Magento and developing your store on the platform involves several steps.
Overall, the process involves setting up the back end of your store, developing the front end using your preferred front-end technology, and integrating the two.
As mentioned, the front and back end in a headless development setup are decoupled. The two separate layers exchange data or communicate via GraphQL or REST APIs. This is why integrating the two layers is part of the steps.
You can write your front end in any language since APIs are interoperable. This allows your developers to work with their preferred front-end tech.
You can place your Magento implementation in the hands of your in-house team if they possess the required technical knowledge or hire outside developers for the job.
Overall, a headless Magento implementation should take the following approach.
Step 1: Select a hosting provider for your Magento site
Your hosting service directly influences your Magento platform's performance, security, and overall success. This is why finding the right hosting provider is crucial to your Magento implementation and headless development.
Magento is a powerful platform, so it requires a hosting service that meets certain minimum server requirements.
Like any business, you will want to grow once the revenue starts coming in. That said, your Magento site's server resources should be scalable to accommodate increased traffic or site activity.
Some service providers specialize in Magento hosting, which can give you an advantage. Such packages feature a straightforward one-click installation and include essential features like a free domain name and SSL certificate.
While you can choose a shared hosting service, we don't recommend it for Magento. Dedicated hosting, where the entire server space belongs to your site, is the best choice for an enterprise.
In a shared hosting environment, your website shares server resources with other websites. So, if any site in that hosting environment experiences a surge in traffic or activity, it will take up more server resources, leaving your site with little. Such a thing can diminish your site’s performance.
Step 2: Install the latest version of the headless Magento
Now that your hosting service is selected and ready to domicile your new store, proceed and set up the Magento 2 back end.
Just like a traditional Magento 2, the headless back end has all the robust ecommerce capabilities. It is the part of your online store responsible for order processing, inventory management, and customer data management.
So, what we are saying here is that headless development lets you continue to leverage Magento's powerful back-end features while enjoying the benefits of a decoupled architecture.
How exactly do you go about this? Let’s take a closer look.
The goal here is to install Magento 2 and configure it to work with your business requirements. Setting up your back end in this headless development may also involve installing necessary modules or extensions to support the headless Magento architecture.
Start by visiting the official Magento website and create an account. Next, download the latest version of Headless Magento 2 and install it.
Step 3: Develop your front end
Setting up your store’s front end requires selecting your preferred front-end tech stack and developing custom UI (user interface) components.
Popular technologies for developing the Magento front end in headless development include React, Angular, and Vue.js. These modern web technologies should align with your design and functionality goals.
While at it, ensure you tailor the user interface components to match your brand's aesthetics and user experience expectations.
Whichever technology you choose should create a dynamic and visually appealing user interface. Such UIs have a modern appeal that provides immersive shopping experiences.
Step 4. Integrate the front end and back end with APIs
Once the Magento front end is ready, it’s time to plug it into your back-end installation. You can use RESTful or GraphQL APIs to implement this integration.
You will need to create the respective APIs using your chosen technology, either REST or GraphQL, which exposes the headless Magento 2 data to the front end.
This API layer is crucial because it not only enables the communication between the Magento front-end and back-end functionality but also ensures the safety of the customer data in the back end.
By keeping the customer presentation layer separate from the Magento 2 back end, the API helps mitigate possible attack vectors on the front-end layer of your store.
Step 5: Choose Magento extensions to customize your store functionality
At this point, your ecommerce site is a complete unit. However, it is still missing key components that you must create or configure.
To this end, you've had plenty of time to decide how you want to manage the content on your ecommerce site.
To give your visitors omnichannel experiences, install a headless CMS (content management system). As the name suggests, a CMS manages content such as blogs on your website.
However, a headless CMS takes content management to a whole new level. It allows you to manage your store’s content in one place and deploy the content across an omnichannel environment. You can serve the content to any digital channel that your customers use.
If you have not configured the site’s product catalog properly, now is the time to do so. Ensure you have the product pages, categories, and subcategories the way you want them and in a manner consistent with your brand.
You should aim to make sure that navigation throughout the site is straightforward.
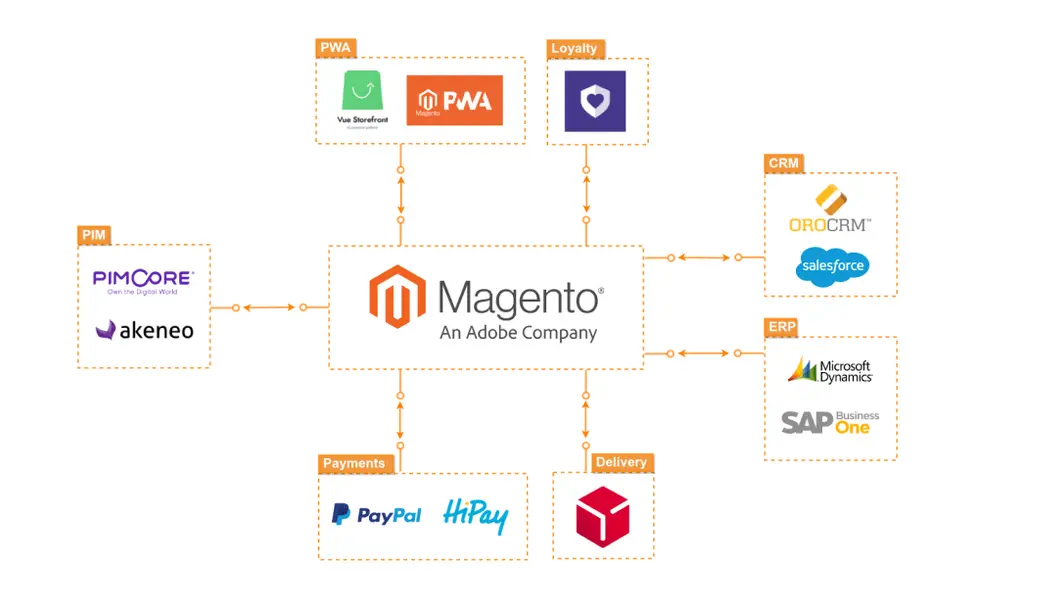
The other integrations you can implement to extend your site’s functionality include analytics, SEO, and accounting tools.
Step 6: Test and optimize your new site
Once you have everything in place, you want to ascertain that everything works as desired. The best way to confirm this is to test the website thoroughly. If your test reveals anything with subpar performance, now is the time to fix it and optimize the entire website.
Here is a checklist of things to evaluate while testing the site before launching it.
No conflict between the extensions installed.
The back end performs properly.
Internal website optimization checkup
The site is optimized for SEO.
The pages load fast.
Step 7: Launch and monitor the site
You made it this far, congratulations. Now it’s time to go live with your new Magento 2 store and continually monitor its performance for required improvements.
Should you hire a Magento front-end developer or do it yourself?
Whether to hire a Magento front-end developer or do the work in-house depends on your team.
Headless development can be complex. You don’t want to implement the APIs improperly, as any such mistake will invariably affect your store’s performance.
So, keep the work in-house only if your team is experienced in developing headless ecommerce websites.
Otherwise, you should be better off leaving the work to experienced headless Magento developers. Hiring a dedicated Magento developer allows you to access a wealth of experience in headless development, ensuring that no stone remains unturned.
Magento Headless Development: Final Thoughts
So, what did we just learn in this article? Getting started with a headless Magento requires setting up the back end of your store, developing the front end using your preferred front-end technology, and integrating the two with an API.
Here are the steps involved:
Selecting a hosting provider
Installing the latest version of headless Magento
Develop your front end
Integrating the front end and back end with APIs
Customizing the store functionality with relevant Magento extensions
Testing and optimizing the new site
Launching the site
We have mentioned ReactJS as one of the modern technologies you can use to develop your Magento front end. In our next article, we’ll discuss some more exciting uses of this technology.
Want to start a headless Magento site? The team of dedicated Magento developers in Los Angeles can help. Talk to them today.