If you have a traditional ecommerce website, one of the greatest challenges is keeping up with the ever-changing customer preferences and technological advancements.
You must be able to scale seamlessly and incorporate change quickly to remain competitive in today’s fast-paced ecommerce space. Unfortunately, the monolithic architecture of a traditional ecommerce platform can make this challenging for some businesses.
If your business serves diverse customers with lots of personalization needs, you may need an ecommerce store with plenty of customization and greater flexibility. This is where headless commerce excels.
In this article, we look at what it means to go headless with your Shopify store and detail how to start a headless Shopify store in five key steps.
What Is Headless Shopify?
Headless Shopify is a Shopify Plus offering that provides users with a front-end component separated from the back-end functionality. It allows users to customize their Shopify store’s front end independently without affecting or being restricted by the core functionalities of the back end.
Headless Shopify differs from traditional Shopify based on its architecture. While the latter is a full-stack offering with the front and back end tightly integrated, the former has a decoupled architecture.
With the decoupled framework, you can publish your Shopify storefront to various platforms much faster. The framework allows you to build your custom front-end presentation layer using third-party apps like React and Next.js and give your customers tailored experiences.
Headless Shopify is an excellent solution for businesses that serve diverse markets. You can create as many front-ends as necessary with the same back-end functionality. All you need to do is use Shopify’s API (application programming interface) to enable the exchange of data between each front end and the powerful back end.
Since changes on the presentation layer of your Shopify store do not affect the back end, you can make them at will. This aspect makes headless Shopify incredibly scalable and flexible.
What does it mean to go headless with your Shopify store?
Going headless with your Shopify store means separating its front end and back end to allow for rapid development and customization on each end of the ecommerce site.
When you go headless, you take a different approach from the traditional one that involves developing and customizing the front and back end of the site in tandem, leaving little room for expedited changes.
A headless ecommerce Shopify lets you work on the front- and back-end development separately. Therefore, you won’t require back-end development resources of your Shopify solution to modify the customer-facing storefront. You can use a third-party solution for this.
More importantly, this independence of the back and front ends means that errors or bugs arising while working on the front end will not likely break the entire site. You have the freedom to scale each layer of the ecommerce platform independently.
How to Start a Headless Shopify Store
Once you decide to go headless with a Shopify store, the next big step is to decide how to approach creating the store. If you have a team of Shopify experts in your company, you can carry out the project yourself.
Otherwise, you will need to leave it to a front-end service provider or an agency.
Here is information about each option and when and why you would choose each.
Option 1: Use a FEaaS (frontend-as-a-service) platform
A FEaaS (Front-End as a Service) platform is a cloud-based or prepackaged software solution providing businesses with the components required to create a headless storefront.
It provides the infrastructure, tools, and resources you need to develop, deploy, and manage the front-end (user interface) of the web or mobile applications you wish to use as the front-end layer of your headless store.
The FEaaS package includes headless CMS software, unique front-end components, out-of-the-box Shopify connections, hosting, and server-side rendering.
Instant Commerce, Frontastic, and Shogun are some of today’s most popular FEaaS platforms. Once you integrate a platform like Instant Commerce with your headless Shopify, it will handle the front end. However, the integration can also allow it to manage Shopify’s ecommerce functionality, like processing orders and managing inventory.
Creating custom storefronts from scratch is one of the biggest challenges people face when going headless. However, using a good FEaaS platform saves you the trouble and allows you to go headless without creating a headless Shopify storefront from scratch.
The storefront is still entirely customizable but does not require setting up the entire infrastructure yourself.
When to use a FEaaS platform
Use a FEaaS platform under the following circumstances:
- If you want expert help through the entire process. Your FEaaS platform may have a partner agency specialized in headless site builds, allowing you to access their help.
- Suppose you don’t mind having limited control. The built-in systems like CMS, CDN, and middleware that come with FEaaS platforms may limit your control over the functions related to these elements.
Option 2: Outsource the work to an agency
Outsourcing the development of your headless Shopify storefront is ideal if you have no capacity to build your own custom storefront from scratch.
You will need to find an agency like Endertech that specializes in building headless Shopify storefronts to ensure everything goes well.
This option keeps the development burden off your shoulders and frees up your internal team to focus on running your business because developing a custom Shopify storefront can take time. It also requires a team that is well-versed in the GraphQL programming language and the applicable frameworks like Ember and React.js.
An agency specializing in Shopify can also help you with crucial ideas for your headless store design, functionality, and customizations.
When to use an agency
- Use an agency if you don’t have an internal team well-versed in developing Shopify storefronts.
- This option is also handy for a business that doesn’t have much time and resources to train a team and develop its own headless Shopify store.
Option 3: Do the work yourself (DIY)
Doing it yourself is just what it sounds like: building your headless Shopify storefront from scratch on your own.
This option is ideal only if you have the right technical expertise and experience in developing headless Shopify solutions. It is also the best option if you want to have full control over your custom Shopify store’s development and customization.
Your team must understand the Shopify APIs and GraphQL, which Shopify has adopted as its primary API language. They must be well-versed in using frameworks like Next.js, Ember, React.js, and Gatsby.
When to go with a DIY option
- Use this option if you want full control of every aspect of the store’s development process and have the time to dedicate to the long-drawn-out process.
- This option is viable if you have an in-house team with the required technical expertise and experience. Shopify’s Hydrogen has no drag-and-drop features, so your team must be comfortable writing code to use it or make any changes.
How to Start a Headless Shopify Store Step-by-Step
Now that we know the available options for starting a headless Shopify store let’s go over the actual process of developing your headless store on Shopify.
Shopify’s headless solution offers a rich arsenal of headless development tools for building your storefront. Developers can also use the platform’s composable technologies to extend store capabilities.
If you are ready to go headless with Shopify, here are the basic steps to follow.
Step 1. Choose your preferred front-end technology
Headless Shopify means you have the back-end functionality without the customer-facing layer—hence the term “headless.”
Therefore, the development process would involve creating your store’s custom front, with the Shopify package as your ecommerce back. Once in place, the front-end presentation layer will pick data from the Shopify ecommerce back end via API calls.
While the ecommerce back end functionality is the same, the headless architecture gives you endless possibilities for your store’s front end.
Provided your team has the requisite skillset to custom code your front end, the options for creating, maintaining, and modifying your store are limitless. That said, the technologies for building your front end can be any of the options below:
- React.js
- Ember
- Next.js
- Gatsby.js
Ember and React.js are the more common technologies used with Shopify storefront templates compatible with the Shopify Storefront API.
Those who prefer a static site generator can go for Next.js or Gatsby.js.
A headless CMS is ideal if you prefer a front-end technology that makes it easier for you to update your site without coding.
Whatever the case, choosing a front-end technology with the features you need should be your starting point.
Step 2. Familiarize yourself with the Shopify Storefront API
You may remember that we already said Shopify’s Storefront API uses GraphQL as its preferred query language.
Once you are signed into your Shopify offering, you will gain access to a host of resources to help you learn the GraphQL API language and how to use the Shopify API. Notice that this does not mean you can use the resources to develop your storefront without prior technical knowledge.
The resources should only guide you on how the language applies to Shopify. The extensive documentation in the API reference section provides useful guidelines for different programming languages and frameworks like Shopify’s Hydrogen, PHP, and Ruby.
The API will serve as the adhesive equivalent to hold together the headless Shopify configuration.
Step 3. Generate your API access token
By now, you know that using Shopify’s API is central to your headless experience on Shopify. To use the API to access your Shopify store’s data, you need an API token. This requires creating a private application in your store and generating a Shopify Storefront API access token.
Start by navigating to your site’s admin section and selecting “Apps.” Next, tap the “Manage private apps” option and “Create new private app.”
After that, type in your preferred application name and email address.
Proceed to the Storefront API section and select “Allow this app to access your storefront data using the Storefront API.”
Next, select the data types that you wish to expose to the app you just created and click “Save.” Once you complete this process, your access token should be at the bottom of the Storefront API page.
Step 4. Add a headless CMS
While adding a content management system to your ecommerce platform is ideally optional, you should consider it a necessity.
You will require it to serve content to site visitors across multiple customer touchpoints. The headless CMS becomes your headless Shopify channels’ central content repository. Thankfully, the power of APIs makes this integration seamless and straightforward.
Step 5. Build Your Custom Storefront
How you build your custom storefront depends on what you want for your business and where you want to serve it.
So, while the above steps apply to everyone starting a headless Shopify store, this part (building your custom storefront) should be unique to your business and the technology stack you have chosen.
Whatever the case, keep your customers in mind when building the perfect custom user interface for them. Remember, the headless ecommerce storefront is the primary customer touchpoint for most cases, making it the point of forming the customer’s first impression of your business.
Headless Website Example
Many headless website examples exist in the ecommerce world today. However, a popular headless website example built on Shopify is Staples Canada.
The company uses headless Shopify to overcome the limitations of an integrated storefront using a single platform for everything. With the headless solution, Staples Canada can implement separate tools for search, reviews, and data layer management. More importantly, it can make big, rapid changes seamlessly.
Additionally, the headless architecture allows the company to optimize each function, including ordering by item number, reordering previously bought items, and registering for accounts.
Should you go headless with your Shopify Store?
You may not need a headless ecommerce Shopify if your business is prospering with traditional architecture.
However, going headless may be beneficial if you want more flexibility, agility, and a more personalized and unique customer experience across various touchpoints.
Recap: How To Start a Headless Shopify Store
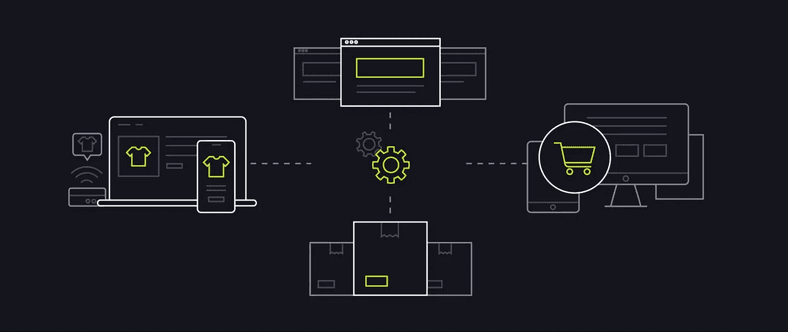
In this article, we have noted that you can start a headless Shopify store by using a frontend-as-a-service (FEaaS) platform, outsourcing the storefront development work to an agency, or building the storefront yourself if you have the technical expertise and time to invest in the process.
Here is a summary of the steps to follow:
- Step 1. Choose your preferred front-end technology
- Step 2. Familiarize yourself with the Shopify Storefront API
- Step 3. Generate your API access token
- Step 4. Add a headless CMS
- Step 5. Build Your Custom Storefront
Next, we’ll look at choosing a CMS for your headless Shopify store, so keep an eye out for that.
Meanwhile, do not hesitate to contact the Shopify experts in Los Angeles for a custom headless Shopify store.