What is Global State?
When developing a website with React, more often than not the developer will want a change in one component to have an effect on another. For example, let’s say that you’re shopping online and you want to filter the products to see only shoes. You select shoes in the filter section and boom, suddenly all of the products displayed are shoes.
How exactly did an action in the filters component trigger a change in the product display component? Well a common answer to this problem is by using global state.
To put it simply, global state is the data that is shared between all the components within a React application. When the state is changed, or let’s say a filter is added, the components re-render accordingly.
In this article, you will learn about how to use the React Context API for Global State, as well as a few of the alternative methods for implementing global state.
Options for Implementing Global State
There are multiple ways to add global state to your React project and each way comes with its own set of strengths & weaknesses. A common, outdated solution to managing global state is a practice known as prop drilling. This involves manually passing in the shared data to each component as props. While this is a simple solution, it is inefficient as components take in props which they have no use for.
Perhaps the most popular solution, Redux, is a third party state management library. Redux has a lot of support and there are some very useful debugging features which is why major companies like Amazon, Instagram, & Doordash use it.
While it can be beneficial to know, unfortunately there is a high learning curve and it can be difficult to implement. For this reason, Redux is not always the logical choice for most websites.
Thankfully the developers who maintain React have released the Context API, which “provides a way to pass data through the component tree without having to pass props down manually”. So it avoids the inefficiencies of prop drilling while also being significantly easier to implement than Redux.
Another perk of using the Context API is that it enables developers to work with functional components, which are generally easier to work with than the class components used by Redux.
Getting Started with React Context API
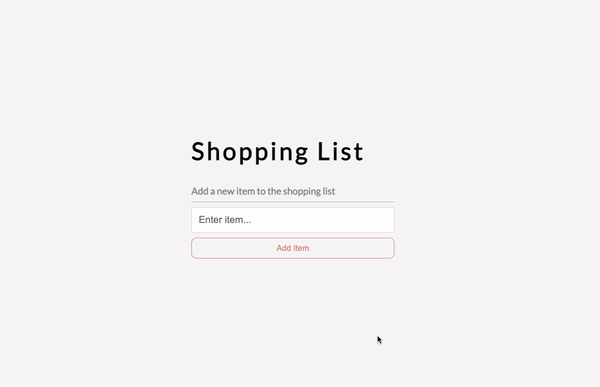
To give you a better understanding of how to use the Context API, let’s look at some code. For this example, we will be creating a simple shopping list application where the user will be able to add items to their list, remove items from their list, and view their list. This means that our application will have at least three components: AddItem, RemoveItem, and ShoppingList.
In a newly created React project, you will want to create two folders within the src directory: components & context.
Move into the context directory and create two files: GlobalState.js & AppReducer.js
In the GlobalState file, we will create a context object that will provide the global state to the app’s components. In the AppReducer file, we will write the necessary code to modify the global state.
import React, { createContext, useReducer } from 'react'; import AppReducer from './AppReducer'; const initialState = { shoppingList : [] } export const GlobalContext = createContext(initialState); export const GlobalProvider = ({ children }) => { const [state, dispatch] = useReducer(AppReducer, initialState); // Actions for changing state function addItemToList(item) { dispatch({ type: 'ADD_ITEM', payload: item }); } function removeItemFromList(item) { dispatch({ type: 'REMOVE_ITEM', payload: item }); } return( <GlobalContext.Provider value = {{shoppingList : state.shoppingList, addItemToList, removeItemFromList}}> {children} </GlobalContext.Provider> ) }
On line 8, we create the GlobalContext object by using the createContext method. We pass in the initial state, which for this application is just a list.
Starting on line 10, we create the GlobalProvider component which provides the rest of the components with access to the global state.
In this component, we also create the necessary actions that allow us to alter our state. For this example, that means adding or removing items from our shopping list. These actions dispatch a type and an action to the Reducer, letting it know which changes need to be made.
Note that in the return statement, one must explicitly specify which values will be accessible to the component’s children. In this case it is the shoppingList itself, the addItemToList function, and the removeItemFromList function.
import React from 'react'; export default (state, action) => { switch(action.type) { case 'ADD_ITEM': return { shoppingList: [action.payload, ...state.shoppingList] } case 'REMOVE_ITEM': return { shoppingList: state.shoppingList.filter(item => item !== action.payload) } default: return state; } }
Setting up the Reducer is relatively simple, all we need to do is create a switch statement for the various action types. For each case, the reducer makes the necessary modifications to the global state.
Once we have those two files set up, we can navigate to the App.js file where we will import the GlobalProvider component.
import './App.css'; import { AddItem } from './components/AddItem'; import { Header } from './components/Header'; import { ShoppingList } from './components/ShoppingList'; import { GlobalProvider } from './context/GlobalState'; function App() { return ( <div className="container"> <Header /> <GlobalProvider> {/* Components that will have access to the global state go here*/} </GlobalProvider> </div> ); } export default App;
Accessing the Global State
Continuing with our shopping list application, we will create the 3 components: AddItem, RemoveItem, and ShoppingList in the components directory. In order for these components to access the global state we will need to use hooks.
Starting with AddItem, we will want to create a text input where the user can enter the items they want into their shopping list. As you can tell, this component will need to access the addItemToList function that is provided by our GlobalProvider.
import React, {useState, useContext} from 'react'; import {GlobalContext} from '../context/GlobalState'; export const AddItem = () => { const [text, updateText] = useState(''); const { addItemToList } = useContext(GlobalContext); const handleSubmit = (event) => { if (text.length){ event.preventDefault(); addItemToList(text); updateText('') } } const handleChange = (event) => { updateText(event.target.value) } return ( <div> <h3>Add a new item to the shopping list</h3> <form onSubmit = {handleSubmit}> <div className = 'form-control'> <input type="text" value={text} onChange={handleChange} placeholder="Enter item..." /> </div> <button className = 'btn'>Add Item</button> </form> </div> ) }
To start, we import the useState & useContext hooks from React as well as the GlobalContext object that was created in the GlobalState file.
On line 7, we pass GlobalContext into the useContext hook allowing the component to access the addItemToList function. Remember that this value was explicitly passed into our GlobalProvider’s return statement. With this component now complete, users are now able to add items to their shopping list.
import React, {useContext} from 'react'; import {GlobalContext} from '../context/GlobalState'; export const RemoveItem = (props) => { const {item} = props; const { removeItemFromList } = useContext(GlobalContext); const handleClick = () => { removeItemFromList(item); } return( <button onClick = {handleClick} className = 'remove-btn'> X </button> ) }
The next component, RemoveItem, provides users with the ability to remove an item from their shopping list. This component requires the removeItemFromList function, which is obtained by passing in the GlobalContext object into the useContext hook.
import React, {useContext} from 'react'; import { GlobalContext } from '../context/GlobalState'; import { RemoveItem } from './RemoveItem'; export const ShoppingList = () => { const { shoppingList } = useContext(GlobalContext); const shoppingMarkup = shoppingList.map((item, index) => ( <li key = {index} className = 'list-item'> {item} <RemoveItem item = {item} /> </li> )) return ( <ul className = 'shopping-list'> {shoppingMarkup} </ul> ) }
The final component, ShoppingList, accesses the global state using the same method used in the previous two components.
Note that the RemoveItem component is nested within the ShoppingList component. If one opted to use prop drilling instead of the Context API, they would have to pass the removeItemFromList function into the ShoppingList component. For this example the difference in performance would be miniscule, but as the project begins to get more complex this would begin to have an adverse effect on the application’s performance.
With these 3 components done, the functionality of our project is complete. All we need to do is simply add them to our App.js file, nested between the GlobalProvider tags. Then simply sprinkle in some CSS styling magic and voilà, we now have a fully functional shopping list.
Our 3 components are now able to access the global state without the hassle of setting up Redux or the tedious process of prop drilling. This is just the tip of the iceberg when it comes to global state management, but hopefully after reading this article you now have a strong enough understanding to start using React’s Context API in your own projects. If you are interested in learning more about the Context API and how it works, please refer to its official documentation here.